Growing Chives For Tasty Leaves & Flowers
If you're new to herb gardening then growing chives is a really good herb to start with. The smallest member of the onion family, the plants are evergreen hardy perennials that self propagate. So once planted will regrow each year with the minimum of care.
They also love thrive in containers and will supply you with a large supply of grass like leaves throughout the growing season.
Step-by-Step Tips Guide on How to Grow Chives

The pretty pink flowers are also edible and have a tasty onion flavour. And if you dry the leaves you can have a supply over the winter.
A sunny spot is the best place for chives, although they will grow in partial shade.
They like a rich well-draining soil, so dig well-rotted manure or compost into the herb bed a few months before planting time.
They are easy to grow from seed and if you have established plants a few years old you can divide the roots for new, smaller plants. Over the winter you can grow chives indoors on a sunny windowsill.
Growing Chives From Seeds Indoors
- In early spring, sow about 10-15 seeds in small 2 inch (6cm) pots using a general potting compost
- Water and keep the temperature at 15-20°C (59-68°F)
- After 3-4 weeks they will be ready to plant outside
Growing Chives Outdoors:
After the last frost has gone, you can plant out your indoor grown seedlings by carefully removing them from the pots and plant the clumps 10-12 inches apart.
From Seed:
- Scatter 15-20 seeds onto the soil in an area 3 inches (7-8cm) across
- Cover with ¼ inch (1cm) compost.
- Repeat this, separating each seed area by 10-12 inches (25-30cm)
They need to be kept well watered at all times particularly in dry weather. If they dry out the leaves will turn brown.
Growing Chives Plants in Containers:
- Fill your container with a general well-draining compost
- Place in a partially shaded or sunny spot
- Plant any seedlings you may have grown inside
- Or scatter seeds on the compost and cover with a ¼ inch (1cm) compost
Water well especially in hot weather.
Pests and Diseases:
Wash any aphids off with a horticultural soap solution.
Like mint they can suffer from rust (I've never had this problem). If this happens destroy infected leaves by burning them.
Harvesting Chives:
From seed you will be able to snip the leaves after about 90 days. From root division it will take about 60 days.
Snip the leaves near the base and cut from the outside of the plant in.
Whilst the flowers are very tasty and attractive, if you want to only chives for the leaves, cut off the flower heads and you will get better growth.
It can be a good idea to let the plants get established for a year as you will yield a much better harvest.
Early Spring: Sow chive seeds inside. Spring: Divide older plants. Plant out seedlings or sow seeds in the garden. Summer: Harvest the leaves. Keep well-watered. Autumn:Harvest the leaves and cut the herb back to 2 inches (5cm) above the soil. Winter: Dig some well-rotted compost or manure in to herb bed.

Image Links to Growing Herbs Pages You May Enjoy
 Cultivating the Tropical
|
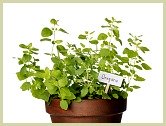 Advice on How to Grow Oregano Plants |
 Top Tips on Growing
|
Return to Growing Herbs
Return to Home


Click on the buttons above to follow me on your favourite social media:

by
Jason Pitcher

Sign up to my monthly newsletter and get a
FREE Book!
Click on the buttons above to follow me on your favourite social media:
New! Comments
Have your say about what you just read! Leave me a comment in the box below.